Backstitch in cross stitch: when and how to use it
Backstitch is the difference between a cross stitch that looks like a pixelated image and one that looks like a finished piece of art. Here's everything you need to know.
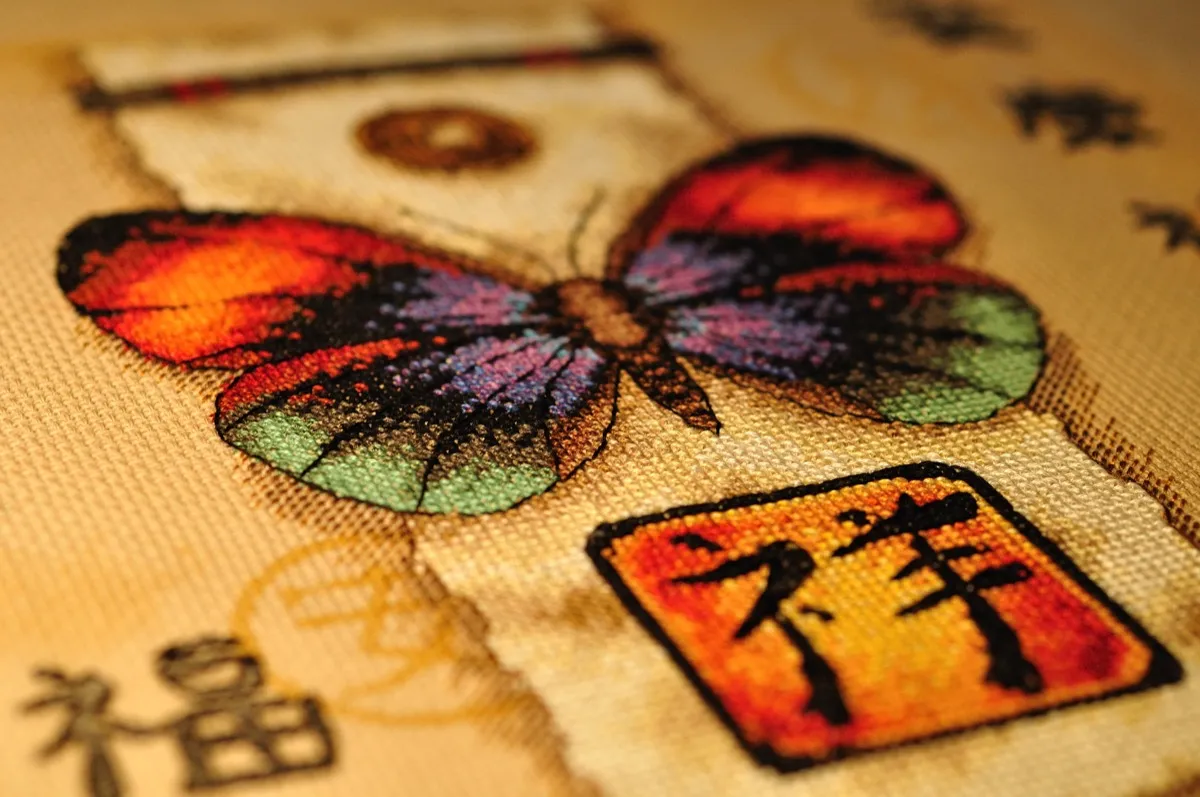
Backstitch is the difference between a cross stitch that looks like a pixelated image and one that looks like a finished piece of art. Those crisp outlines around a face, the sharp edge of a letter, the clean separation between a flower and its stem — that's all backstitch.
It's also the step most beginners dread. The cross stitching is meditative and rhythmic; backstitch feels fiddly and unforgiving by comparison. Here's the thing: it's actually simpler than cross stitch once you understand the three rules that matter.
What backstitch does (and why it matters)
Backstitch is a continuous line stitch worked on top of finished cross stitches. Each stitch goes "backward" into the endpoint of the previous stitch, creating an unbroken line. The result is a crisp outline that sits above the surface of your cross stitches.
Without backstitch, cross stitch designs are made entirely of colored squares. (Backstitch is one of the six stitches every chart uses; the types of cross stitch stitches guide covers the other five.) This works well for geometric patterns, pixel art, and designs with high contrast between colors. But for anything with organic shapes — faces, animals, text, florals — the squares alone can't create clean edges. Two colors side by side at a diagonal look jagged. A face without outlines looks like a mosaic, not a portrait.
Backstitch solves this by adding definition lines that the eye reads as edges. It's the same principle as outlines in illustration: the color fills create the shapes, but the outlines make them readable.
Not every pattern needs backstitch. Simple geometric designs, samplers with distinct color blocks, and pixel art–style patterns often look better without it. If your design has strong color contrast and blocky shapes, backstitch would add clutter rather than clarity. The rule of thumb: if you can tell what the image is from the cross stitches alone, backstitch is optional. If it looks like a blur of colored squares without outlines, it needs backstitch.
The three rules of backstitch
1. Always stitch it last
Backstitch sits on top of your cross stitches. If you backstitch first, the cross stitches will cover and distort the lines. The same rule applies when you design your own pattern: draw the backstitch layer last. Complete all cross stitches in a section before adding backstitch to that section.
Some stitchers complete the entire piece before backstitching anything. Others backstitch section by section as they finish areas. Both approaches work — the only rule is that the cross stitches in an area must be done before you add backstitch lines to that area.
2. One strand is usually right
The standard convention: if you're using two strands for cross stitches on 14-count Aida, use one strand for backstitch. This creates a line that's visible and defining without overwhelming the cross stitches underneath. (For a full strand count reference across all fabric types and thread types, see the thread guide.)
| Fabric count | Cross stitch strands | Backstitch strands | Effect |
|---|---|---|---|
| 11-count | 3 | 1–2 | 1 strand for delicate outlines, 2 for bold |
| 14-count | 2 | 1 | Standard — delicate, clean definition |
| 14-count | 2 | 2 | Bold outlines — good for text, cartoon style |
| 16-count | 2 | 1 | Standard |
| 18-count | 1–2 | 1 | One strand only — two strands overwhelm fine stitches |
When to use two strands: text and lettering (needs to be readable), bold cartoon-style outlines, borders and frames, and any design where the backstitch IS the design (not only supporting it).
When to use one strand: portraits and faces, subtle separation between color areas, fine details like whiskers, eyelashes, or plant tendrils, and most standard pattern work.
Some designers vary strand counts within the same design — two strands for a bold foreground outline and one strand for background detail. If your pattern specifies strand counts per backstitch color, follow those instructions. The designer tested it. The strand guidance above applies regardless of whether you're using DMC, Anchor, or another thread brand — it's about fabric count, not thread brand.
For more on fabric count and strand recommendations, see the fabric types guide.
3. Backstitch runs between grid intersections, not square centers
This is the concept that confuses most beginners. Cross stitches fill squares. Backstitch connects the corners where squares meet — the grid intersections.
Think of it this way: cross stitches live inside the squares. Backstitch lives on the grid lines between squares. Your needle enters and exits at the same points where the corners of four squares meet.
This means backstitch can go in any direction — horizontal, vertical, and diagonal. A single backstitch line from one intersection to another can cross the full diagonal of a square, run along one edge, or span multiple squares in a straight line. The pattern chart shows these as straight lines connecting intersection points.
How to read backstitch on a chart
Backstitch appears on pattern charts as straight lines drawn over the grid. (For a broader introduction to chart reading — symbols, the key, color charts vs symbol charts — see how to read a cross stitch pattern.) Here's how to interpret backstitch specifically:
Line color: Each line color on the chart corresponds to a thread color in the backstitch legend. Most patterns use black (DMC 310) for the majority of backstitch, with occasional other colors for specific elements — a dark brown for hair outlines, a dark green for plant stems, a dark blue for water edges.
Line position: Lines run between grid intersections (the corners where four squares meet). A horizontal line running along the top edge of three squares means one continuous backstitch spanning three grid units. A diagonal line crossing a square corner-to-corner means one stitch going diagonally.
Separate backstitch charts: Some designers provide a separate page showing only the backstitch lines on an empty grid. This is easier to read than backstitch overlaid on a full-color chart. When working from a combined chart, try squinting to see just the lines — or if your pattern comes as a PDF, look for a backstitch-only page.
Backstitch line length: Each individual stitch should span no more than 2–3 grid units. Longer lines on the chart may look like one stitch, but you should break them into segments. Stitches longer than 3 grid units tend to snag and don't lie flat. If the chart shows a long straight line, stitch it as a series of connected shorter stitches — the finished result looks the same.
How to backstitch step by step
Here's how to work backstitch, step by step.
Starting. Bring your needle up at point A (a grid intersection). Go forward along the line to the next intersection and bring the needle down at point B. Come up at point C (the next intersection forward) and go back down at point B. Come up at point D and go back down at point C. Continue this pattern.
The "backward" part is that you always insert the needle backward into the previous stitch's endpoint. This creates a continuous line on the front with no gaps.
Traveling. When you reach the end of one backstitch line segment and need to start another nearby, you can travel under existing cross stitches on the back of the fabric. Keep travel distances short (2–3 squares maximum) and weave under existing stitches so the travel thread doesn't show through the front.
Turning corners. At a corner, change direction. Bring the needle up at the next point along the new direction and stitch back into the corner point. The backstitch line will make a clean angle.
Ending. Weave the tail under 3–4 existing stitches on the back and trim. Don't use a knot — it creates a bump that shows on the front, especially on higher-count fabrics.
Common backstitch mistakes
Pulling too tight. Backstitch should lie flat on the surface of your cross stitches, creating a slight ridge. Pulling too tight distorts the cross stitches underneath and makes the fabric pucker. The thread should follow the surface without sinking in or pulling the fabric.
Starting backstitch before finishing cross stitches. If you backstitch an area and then add cross stitches next to it, the cross stitches will push under the backstitch line and distort it. Always complete all cross stitches in an area first.
Using too many strands. Two strands of backstitch on 18-count fabric creates a heavy, raised line that dominates the delicate cross stitches. Match your backstitch strand count to the fabric count using the table above. When in doubt, use one strand — you can always add a second pass if the line isn't visible enough.
Making stitches too long. Individual backstitch segments should span 1–3 grid units. Longer stitches don't lie flat against the fabric and are prone to catching and snagging. If your pattern shows a long line, break it into shorter connected segments.
Skipping backstitch entirely. Some stitchers finish the cross stitching and feel the piece looks "done enough" without backstitch. If the pattern was designed with backstitch, the designer tested it both ways — the backstitch is there for a reason. Try adding it to one section before deciding to skip it. The difference is often dramatic, especially on faces and text.
Backstitching in a color that's too similar to the cross stitches. Backstitch needs contrast to be visible. Dark brown outlines on dark brown cross stitches disappear. If the pattern calls for a backstitch color that's very close to the fill color, it's usually intentional — a subtle definition line rather than a bold outline. But if it genuinely doesn't show, one shade darker won't hurt.
When to skip backstitch
Not every pattern benefits from backstitch. Here's when to leave it off:
Pixel art and retro game designs. The square, blocky look IS the aesthetic. Backstitch would fight the style.
Full-coverage abstract patterns. If the design is a geometric or abstract fill with no representational shapes, outlines add visual noise.
Patterns where the designer didn't include it. If the chart has no backstitch instructions, the designer designed without it. Adding backstitch to a pattern that wasn't designed for it often looks wrong because the color boundaries aren't positioned for outline placement.
When you're stitching for speed, not detail. A small ornament or quick gift project might not need the extra hours of backstitch. That's a personal tradeoff — the piece will look good, just less defined.
The reverse case exists too: when the backstitch lines are the whole design and there are no crosses at all, you're in blackwork territory — a counted technique in its own right, worked on the same fabric with the same floss.
Backstitch in pattern software
If you're designing your own patterns — from photos or from scratch — backstitch is something you add as a separate layer on top of the cross stitch grid.
In Stitchmate, the backstitch tool lets you draw backstitch lines manually, placing each line segment between grid intersections. For photo conversions, you can add backstitch after converting to define edges the converter can't capture with cross stitches alone — faces, text, and fine details benefit most. Backstitch also powers an entire category of cross stitch fonts — elegant script and gothic lettering that renders as thin outline strokes rather than filled squares. For the stitching side — working a backstitch alphabet, centering a name, adding a signature — see how to cross stitch letters and names.
When you export a PDF, backstitch appears as lines on the chart with a separate legend. The legend shows which thread color to use for each backstitch line style. Pattern Keeper–compatible exports include backstitch data so stitchers can track their progress on the outline pass too.
The FLOW score accounts for backstitch in its Workability component. Heavy backstitch increases the overall complexity score — which makes sense, because backstitch adds time and concentration to the stitching experience. A pattern with 2,000 backstitch segments is a different commitment than one with 200. The time calculator can estimate total project time including backstitch.
FAQ
What is backstitch in cross stitch?
When should I add backstitch to a cross stitch pattern?
How many strands should I use for backstitch?
Do I backstitch before or after cross stitching?
How do I read backstitch on a cross stitch pattern chart?
What is the difference between backstitch and outline stitch in cross stitch?
Can backstitch go diagonal on a cross stitch pattern?
How does backstitch affect stitching time?
Try adding backstitch to your next pattern
Design from scratch or convert a photo — then add backstitch outlines for crisp definition.
Open the pattern makerFree to use. No account required.
Related Guides & Tools
Cross stitch fabric types
Aida, evenweave, or linen? Compare fabrics by count, difficulty, and finished look — including strand recommendations.
What is FLOW score?
How Stitchmate measures pattern quality — fragmentation, locality, optimization, and workability explained.
What is confetti in cross stitch?
Why scattered single stitches make patterns harder to stitch, and how to clean them up.

How to convert a photo to a pattern
Step-by-step guide to turning any photo into a stitchable pattern.
How to fix cross stitch mistakes
Fixing backstitch is easier than cross stitch — techniques for undoing and correcting outline errors.
How to cross stitch letters and names
Full-stitch vs backstitch lettering, centering a name on the grid, and how tall letters should be.
Blackwork cross stitch
Counted embroidery built from lines, not crosses — Holbein stitch, fills, and combining it with cross stitch.