How to Do Diamond Painting: A Beginner's Guide from First Drill to Finished Canvas
Diamond painting has the lowest floor of any chart craft: pick up a drill with a waxed pen, press it on its symbol, repeat. Here's the full workflow — and the handful of habits that separate a crisp finish from a wavy one.
Here's how to do diamond painting in one sentence: pick up a tiny resin drill with a wax-tipped pen, press it onto the canvas square printed with its matching symbol, and repeat until the picture appears. That's genuinely the whole skill. No stitches to learn, no tension to manage, no way to "do it wrong" that a pair of tweezers can't undo.
Which is exactly why the craft deserves a real guide anyway — because the difference between a crisp, glittering finish and a wavy one with dusty patches isn't talent. It's about eight habits, most of them decided in the first ten minutes. This guide walks the full path: what's actually in the box, how to set up, the placement workflow step by step, and the beginner mistakes that are much easier to skip than to fix. (If you're so new you're still deciding whether this craft is for you, start with what diamond painting is and come back.)
What you're working with
Four words do most of the work in this craft, and using them precisely will make every legend, forum thread, and troubleshooting answer suddenly make sense:
Drills are the pieces you place — small faceted resin gems, either square (2.5 mm) or round (2.8 mm). Nobody's drilling anything; the name is an artifact of translation that stuck, and the community uses it universally.
Adhesive is the sticky layer on the canvas itself, protected under a clear film until you're ready to work. It's what holds the finished piece together, which is why protecting it is half the habits in this guide.
Wax is the different sticky thing: the pink or white putty you press the pen tip into so it can pick up a drill. Wax grabs the drill; adhesive keeps it. Mixing up the two words is the classic beginner tell.
DMC numbers are the color language. Each symbol on the canvas maps, via the legend, to a numbered color borrowed from the DMC embroidery floss system — so "I need more 310" means black everywhere in the hobby, on every legend, from every seller. When you reorder a color, you order by that number.
The canvas itself is a printed grid: one cell per drill, each cell carrying the symbol for its color. Your job is transcription, and the legend is the dictionary.
Set up before you peel anything
Diamond painting asks very little of your workspace, but the little it asks is non-negotiable: a flat, stable surface. A table, a desk, a lap desk with a hard top — anything that keeps the canvas horizontal. Drills placed on a slanted canvas creep before the final press, and trays of loose drills and gravity are natural enemies.
A light pad under the canvas is optional but earns its keep fast, especially on dark canvases where navy, black, and deep purple symbols blur together. It's the single accessory most stitchers add first. Beyond that, your kit's pen, wax, and grooved tray cover the essentials; when you're ready to see what else exists — multi-placer tips, tweezers, drill organizers — the diamond painting tools guide sorts the useful from the merely cute.
Good light, a comfortable chair, and something to listen to complete the setup. This is a craft built for podcasts.
The workflow, step by step
This is the whole craft, in order. Steps 1 and 2 happen once; steps 3 through 8 cycle until the canvas is full.
- Unbox and check the drills against the legend. Lay out every bag and confirm each one matches a line on the legend before you place anything. Shortages and mislabeled bags are far easier to resolve on day one than at 90% done. While you're at it, photograph the legend — it's the one piece of paper you cannot afford to lose.
- Set up your flat surface as above, light pad underneath if you have one.
- Peel the protective film back in small sections only — never all at once. This is the most important habit in diamond painting. Exposed adhesive dries out, and it collects dust, lint, and pet hair with supernatural efficiency. Fold back just the patch you'll finish this session; lay the film back down when you stop.
- Pour one color into the grooved tray and shake it gently. The grooves catch the drills and the shake flips them facet-up, ready for the pen. One color at a time — mixed trays are how near-identical shades end up swapped.
- Wax the pen tip. Press the hollow tip into the wax once or twice. When drills stop lifting cleanly, that's your cue to re-wax, not to press harder.
- Pick and place, following the symbol chart. Touch the waxed tip to a drill's faceted top, carry it to its symbol, press down lightly. The adhesive out-grips the wax, the drill stays, the pen comes away clean. Repeat a few thousand times — that's the meditative part everyone's talking about.
- Use the checkerboard method for large single-color areas with square drills. Place every other drill first, like the black squares of a checkerboard, then fill in the gaps. The spacing gives each drill room to seat itself and keeps rows straight; filling a big field edge-to-edge in solid rows is how small alignment errors compound into visibly wavy lines.
- Press finished sections. Lay the film back over a completed area and go over it with a roller — or a heavy book — to seat every drill firmly in the adhesive. Do this as sections finish rather than saving it all for the end.
That's the loop: peel a little, pour a color, place, press. Sessions are relaxed evenings, and a full canvas is a matter of weeks, not days — which is the point, not a problem.
Square or round drills?
You'll choose between two drill shapes, and the choice changes how the work feels more than how it looks from across the room.
Round drills (2.8 mm) are faster and more forgiving. They center themselves as you place them, small alignment wobbles vanish, and the tiny gaps between neighbors are a normal part of the finish, not a flaw. Square drills (2.5 mm — exactly 4 per centimeter) sit edge to edge for crisp, gap-free coverage, and they give that satisfying snap as each one clicks in against its neighbors. The price of the crispness: square rows have to be straight, because every drift shows.
The decisive default: round for your first kit and for photo pieces, square for geometric art. Photos read beautifully in round because organic images hide the gaps; geometric designs — mandalas, pixel art, hard-edged patterns — reward square's clean grid. If you want the full comparison before committing, the square vs round drills deep-dive covers finish, speed, and edge cases; for a first canvas, round is the low-stress answer.
Choosing your first canvas
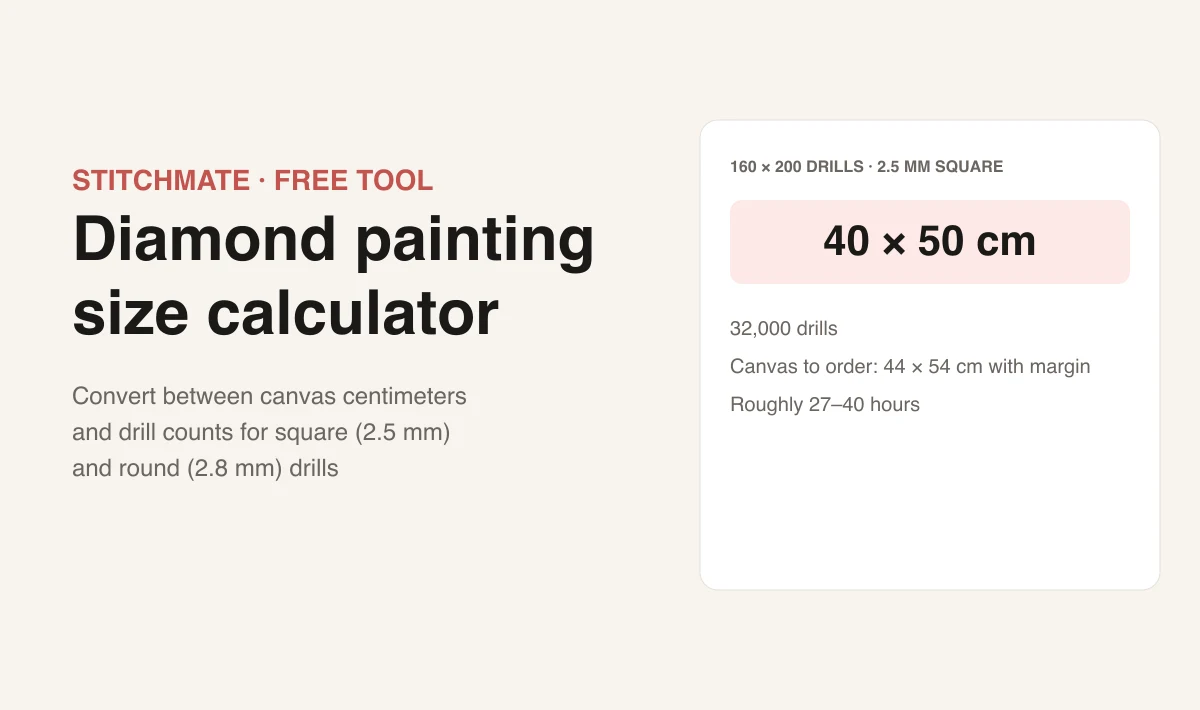
Here's the sizing math nobody puts on the box. A 20×20 cm canvas holds 80×80 square drills — 6,400 placements. A 30×40 cm canvas is 120×160, or 19,200. Those numbers matter for two opposite reasons.
For effort, small is your friend: 6,400 drills is a genuinely finishable first project that teaches you the whole workflow. For detail, small is the enemy: 80×80 cells is a coarse pixel grid, and a detailed photo — a pet's face, a portrait — simply cannot survive it. A 30×40 cm canvas is the sensible minimum for a portrait; below that, whiskers and eyes dissolve into mush no matter how good the kit is.
So the honest recommendation: make your first canvas a simple, graphic design at 20×20 or 30×30 cm — bold shapes, big color areas — and save the portrait for canvas number two at 30×40 cm or larger. If you're weighing a specific image against a specific size, the size calculator does the drills-per-canvas math for you.
One warning for the custom-kit route: quality varies wildly, because most custom sellers run your photo through automatic conversion with no human judgment applied — and a careless conversion at too small a size is the number one source of disappointing kits. If you want to see exactly what your photo becomes before anyone prints a canvas, you can convert the photo to a diamond painting chart yourself and judge the result with your own eyes first.
Tips that make it faster
Multi-placer tips are the biggest legitimate speed upgrade. Most pens accept wider tips that pick up 3, 5, or 9 drills at once — useless for detailed areas, transformative for big single-color backgrounds, where a 9-placer lays down a neat row in one press. Pair it with the checkerboard method and large fields stop being a slog.
Work one symbol at a time within your peeled section rather than hopping colors constantly. Every color swap costs a tray change; batching placements by color keeps you in rhythm.
About confetti — the scattered areas where nearly every drill is a different color: you'll hear strong opinions in both directions, and both are right. Plenty of stitchers love confetti sections; that dense, shifting shimmer is exactly what makes photorealistic pieces glow, and "confetti nights" are a genre of their own. What nobody loves is unnecessary confetti — the noise a careless auto-conversion sprinkles into what should be smooth areas, adding hours of single-drill placements that contribute nothing to the image. If you design your own charts, that's a solvable problem: Stitchmate's diamond painting pattern maker can flag and clean up stray single-drill scatter while leaving intentional detail alone. Judge confetti by whether it's earning its sparkle, not by its presence.
Press as you go. Rolling each finished section (step 8) isn't just for the end — freshly pressed drills stop being snag hazards for your sleeve.
Beginner mistakes to skip
- Peeling the whole film at once. The single most common regret. Exposed adhesive dries out and becomes a lint trap; by the time you reach the far corner, drills won't stick and pet hair will. Small sections, always.
- Pressing drills down with your fingers. Skin oils transfer to the drill facets and dull the sparkle — and fingertips on exposed adhesive are worse. Let the pen do the pressing; use the roller-over-film for real force.
- Losing the legend. The legend is the only map between symbols and DMC numbers, and replacing a lost one ranges from annoying to impossible. Photograph it on day one. (Yes, this is the second time this guide has said so. That's how much it matters.)
- Working on a slanted surface. Couch-arm diamond painting ends with drills migrating downhill and a tray of 2,000 beads in the sofa cushions. Flat table, every time.
- Buying a canvas too small for a detailed photo. The heartbreak mistake, because you don't discover it until the face you love is an unrecognizable smear. Detailed images need drill counts that only bigger canvases can hold — run the numbers before you order, not after.
FAQ
Is diamond painting hard to learn?
How long does a diamond painting take?
Round drills leave tiny gaps — is that normal?
What if I run out of a drill color?
Do I need to seal a finished diamond painting?
Design Your Own Diamond Painting Chart
Create a diamond painting chart from scratch or from a photo — round or square drills, a DMC legend with exact drill counts, and a printable PDF. Free, no signup.
Try Stitchmate FreeNo account required. Works in your browser.
Related Guides & Tools
What Is Diamond Painting?
The craft from zero — where it came from, what a kit is, and why it hooks people.
Square vs Round Drills
The full drill-shape comparison: finish, speed, coverage, and which suits which art.
Diamond Painting Tools & Accessories
Light pads, multi-placers, trays, and organizers — what earns its keep.
Diamond Painting Size Calculator
Drills-per-canvas math for any size — and whether your photo will survive it.
Photo to Diamond Painting Converter
See exactly what your photo becomes as a chart — before anyone prints a canvas.
Diamond Painting Pattern Maker
Design charts from scratch with drill counts, confetti cleanup, and PDF export.