How to Cross Stitch: A Step-by-Step Guide for Beginners
One stitch, two diagonals, repeated on a grid. Here is how to make it, how to work it in rows, what to buy, and how to start a first piece without the usual mistakes.
To cross stitch, you make small X-shaped stitches on a grid fabric called Aida, one X per square, following a chart that shows which color goes in each square. Each X is two diagonal stitches: the first from the bottom-left corner of the square to the top-right, the second from the bottom-right to the top-left. Start at the center of the fabric and the chart, use two strands of floss on 14-count Aida, and work outward. That's the whole technique; the rest is counting carefully and a few habits that keep the work neat.
Cross stitch in seven steps
- Cut the fabric with at least 3 inches of margin on every side.
- Find the centers of the fabric (fold it in half twice) and of the chart (follow the arrows on its edges).
- Prepare the thread: 18 inches of floss, strands separated, two put back together.
- Start without a knot using a loop start.
- Make the cross: up bottom-left, down top-right, up bottom-right, down top-left.
- Work outward in blocks of ten, checking your count against the chart's bold lines.
- Finish each thread by weaving it under four or five stitches on the back.
Each step is explained below, with diagrams of the stitch itself.
How to make a cross stitch
Aida is woven in small square blocks with a hole at every corner. One cross stitch fills one block, and the needle only ever goes through those corner holes.
- Up at 1, the bottom-left corner of the square, from the back of the fabric.
- Down at 2, the top-right corner. That's the first leg, a diagonal.
- Up at 3, the bottom-right corner.
- Down at 4, the top-left corner. The second leg crosses the first, and the X is done.
Pull each leg until the thread lies flat on the fabric, then stop. Pulled too tight, the stitch thins out and the fabric puckers; too loose, the legs stand up in loops.
Keep every top leg leaning the same way. Light catches the top leg, so a stitch crossed the other way reads as a slightly different shade, even in the same color. It doesn't matter which way you choose, only that you stick with it. The easiest habit is to never turn the fabric while you work.
English vs Danish method
There are two ways to work a row of stitches in the same color, and most stitchers use both.
The English method completes each cross before moving to the next. It's the right choice for single stitches, scattered stitches, and anywhere the color changes every square or two.
The Danish method works a whole row of first legs going one way, then comes back along the row crossing each one. For runs of three or more stitches in one color, it's faster and the stitches come out more even, because your hand repeats the same motion. Stitchers often report it as 10–15% faster for areas of continuous color; how long cross stitch takes has more on speed.
Whichever you use, the top legs should all point the same way, so the two methods can sit side by side in the same piece without anyone noticing.
What you need
A first project needs six things, and none of them is expensive.
| Item | What to get | Why |
|---|---|---|
| Fabric | 14-count Aida, white or antique white | 14 squares per inch: large enough to see, fine enough for detail. Holes are visible, so the needle finds them |
| Floss | Six-strand cotton embroidery floss (DMC is the default brand) | The chart lists color codes; you buy those skeins. Use two of the six strands on 14-count |
| Needle | Tapestry needle, size 24 | Blunt tip slides into the holes without piercing threads; large eye takes two strands without fraying |
| Hoop | 6-inch embroidery hoop — optional | Keeps tension even while you learn. Many stitchers work Aida in hand. Take it off between sessions |
| Scissors | Small, sharp embroidery scissors | Clean cuts stop floss fraying in the needle eye |
| The chart | From a kit, a designer's PDF, or one you made yourself | Print it larger than the original if the symbols are small, or read it on a tablet |
Fabric. The "count" of a fabric is how many squares — and therefore how many stitches — fit in one inch. 14-count Aida means 14 stitches per inch. It is the standard for kits and the right place to start; 11-count is larger and coarser, 16- and 18-count are finer and harder on the eyes. Zweigart is the reference mill for Aida and the brand most kits use. What is Aida count explains how count changes the look of a piece, and cross stitch fabric types covers evenweave and linen for a softer finish.
Floss. Embroidery floss comes as a skein of six loosely twisted strands. You separate them and use two strands on 14-count Aida — full coverage without bulk. DMC is the brand nearly every chart is written in; if a chart lists "310" or "3371", that is a DMC number. Cross stitch thread types covers how strand counts change with fabric count and what the specialty threads are for.
Needle. A tapestry needle has a blunt point that slips between the fabric threads into the hole instead of splitting them. Size 24 suits 14-count; use a 26 on 16- or 18-count and a 22 on 11-count.
Nice to have, not required: a needle minder (a small magnet that holds your needle on the fabric), a highlighter for the chart, a water-soluble pen for gridding, and a daylight lamp — white Aida under warm light hides its holes.
Your first project, step by step
This is the sequence for starting any cross stitch pattern, whether it came in a kit or off a printer. Chart symbols, the key, and center marks are covered in how to read a cross stitch pattern; the steps below assume you have that open alongside.
- Cut the fabric with a margin. Add at least 3 inches on every side of the design. A 50 × 50 design on 14-count is about 3.6 inches square, so cut roughly 10 inches square. Masking tape or a zigzag stitch around the edge stops it fraying while you work.
- Find the center of the fabric. Fold it in half, then in half again. Where the two folds cross is the center. Mark it with a pin or a loose tacking stitch in a contrasting thread.
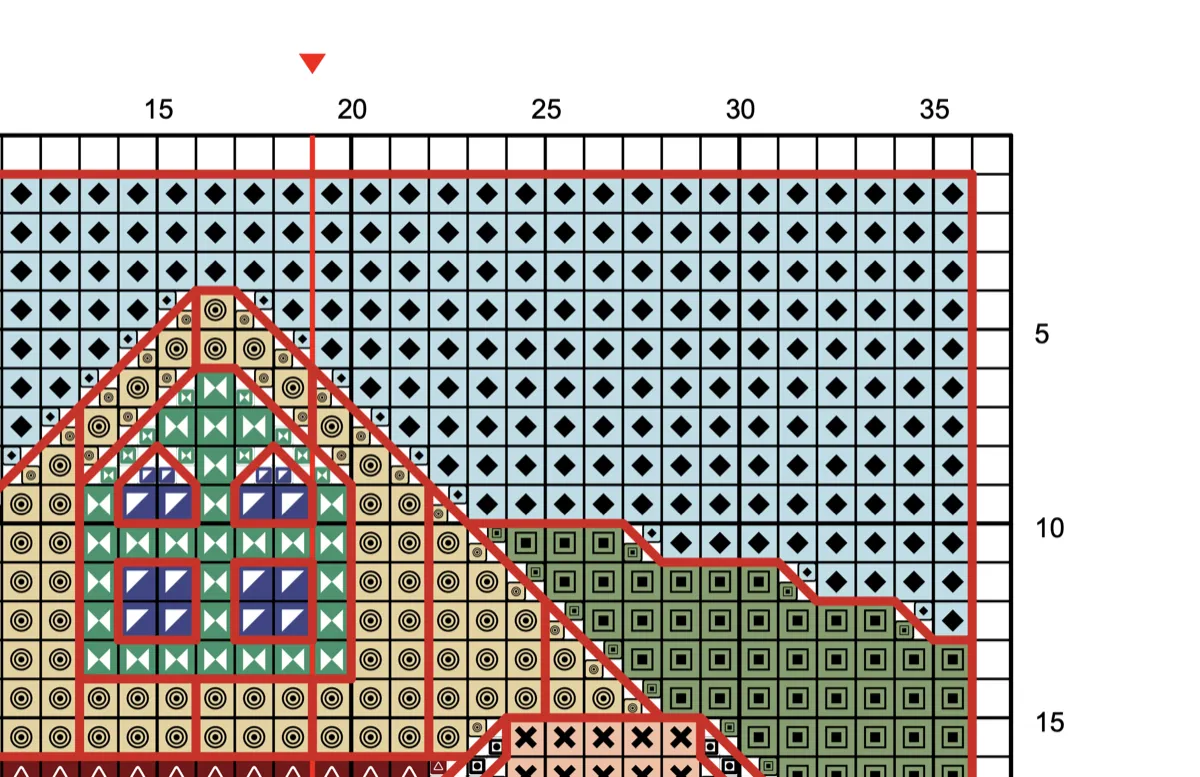
- Find the center of the chart. Small arrows on the chart's edges point to the center row and center column; where they meet is the center square. Charts are worked from the center out so the design lands in the middle of the fabric however you cut it.
- Prepare the thread. Cut about 18 inches — longer tangles. Separate the six strands by pulling one at a time straight out of the bundle (called stripping the floss), then put two back together. Stripped strands lie flatter and cover better.
- Start without a knot. The loop start works with an even number of strands. Cut a single strand at about 36 inches, fold it in half, and thread the two cut ends through the needle so a loop hangs at the far end. Bring the needle up from the back at your first hole, make the first diagonal, take the needle down, and pass it through the loop on the back before pulling snug. No knot, no tail. For one or three strands, leave a 1-inch tail on the back and catch it under your first four or five stitches instead.
- Stitch from the center out. Make your first crosses at the center of the chart onto the center of the fabric, using the English or Danish method as the colors allow.
- Count in blocks of ten. Every chart has heavier lines every ten squares. Work one ten-by-ten block, then count from your stitches to the nearest bold line before starting the next. A counting error is caught within ten squares instead of fifty.
- Grid the fabric for anything larger than a small motif. Gridding puts the chart's bold lines onto the fabric: a contrasting sewing thread run along every tenth row and column, a water-soluble pen, or pre-gridded Aida that washes clean. It costs an hour at the start and removes most of the miscounting risk for the rest of the project. The gridding guide compares the methods.
- Park a thread instead of finishing it. When a color stops for a few squares and returns nearby, bring the needle up where it next appears and leave it there while you work another color. This is parking, and the parking method guide explains when it's worth it. Do not carry a thread more than about an inch across the back of unstitched fabric — dark floss behind white Aida shows through from the front.
- Finish a thread. With about 3 inches left, turn to the back, run the needle under four or five stitches of the same color, and trim close. No knots — they show as bumps once the piece is pressed and framed.
- Wash and press when the last stitch is in. Hand wash in lukewarm water with mild soap, rinse, roll in a clean towel to blot, and press face down on a towel while still damp. Hoop marks come out and the stitches even themselves.
A good first project is a single motif of 30 to 60 squares each way, in six to twelve colors, with little or no backstitch — small enough to finish while the enthusiasm lasts, large enough to practice every step above.
The other stitches charts use
The full cross does most of the work in any chart; four others show up often enough to know.
Half stitch. One diagonal only — the first leg of the X without the return. Charts use it for skies, water, and shadows, where the lighter coverage lets the fabric show through and pushes that area back. The key gives it its own symbol, often a slash. Match its direction to the top leg of your full stitches.
Quarter and three-quarter stitches. A quarter stitch runs from one corner of the square to its center; a three-quarter stitch is a half stitch plus a quarter. Charts use them on curved edges — a face, a leaf, a letter — where a full square would look stepped. On Aida the short leg means pushing the needle through the center of the block, which takes a firm hand at first. If your chart has none, you have a beginner-friendly chart.
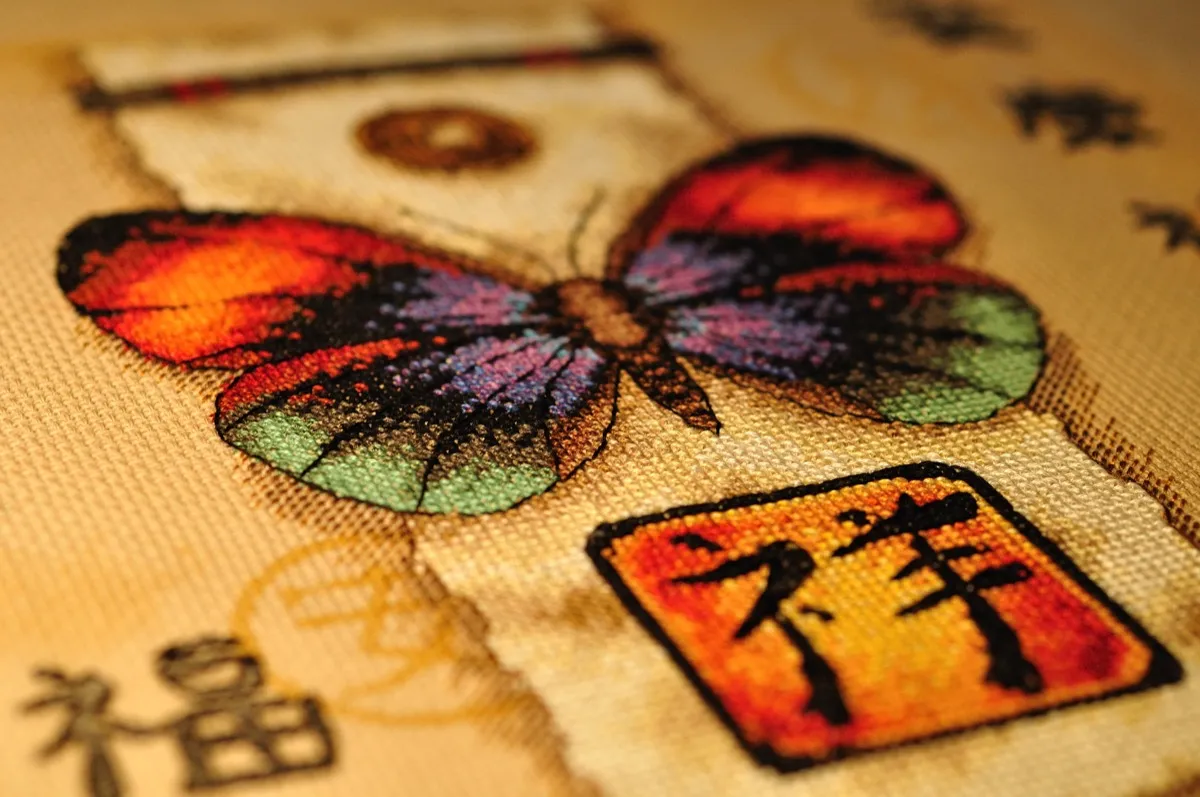
Backstitch. A straight line worked on top of finished cross stitches, hole to hole along the grid lines or diagonally across squares. It gives outlines, lettering, whiskers, and facial features their definition. It is done last, usually in one strand, and appears on the chart as lines rather than symbols. Backstitch in cross stitch covers strand counts, reading it on a chart, and the mistakes to avoid.
French knot. A small raised knot made by bringing the needle up, wrapping the thread once or twice around it, and taking it back down a thread's width away. Charts use French knots for eyes, flower centers, and berries, shown as a filled circle. They are the fiddliest of the five, and many stitchers substitute a bead or a tiny cross.
Types of cross stitch stitches compares all six side by side, and the cross stitch glossary has short definitions for the rest of the vocabulary you will meet in charts and kits.
Fabric count and finished size
The chart fixes how many stitches a design has. The fabric decides how big it comes out. The relationship is one division:
stitches ÷ fabric count = inches
A design 100 stitches wide on 14-count Aida is 100 ÷ 14 = 7.1 inches wide. Move the same chart to 18-count and it shrinks to 5.6 inches; on 11-count it grows to 9.1 inches. Nothing about the chart changes, and the stitching time barely changes either — it is the same number of stitches, worked smaller or larger.
Here is a 100 × 140 stitch design — a typical medium chart — on the four common Aida counts:
| Fabric count | Finished design size (in) | Finished design size (cm) | Fabric to cut, with 3-inch margins |
|---|---|---|---|
| 11-count | 9.1 × 12.7 | 23.1 × 32.3 | 15 × 19 in |
| 14-count | 7.1 × 10.0 | 18.1 × 25.4 | 13 × 16 in |
| 16-count | 6.3 × 8.8 | 15.9 × 22.2 | 12 × 15 in |
| 18-count | 5.6 × 7.8 | 14.1 × 19.8 | 12 × 14 in |
Strand count and needle size move with the count too — three strands and a size 22 needle on 11-count, two strands and a 24 on 14 and 16, one or two strands and a 26 on 18 — because there is less room in each square as it shrinks. If a chart is written for one count and you want another, the fabric calculator gives the finished size and fabric to cut for any count, including evenweave and linen worked over two threads.
What "counted" cross stitch means
There are two ways to know where a cross stitch goes.
In stamped cross stitch — also sold as printed or pre-printed cross stitch — the design is printed onto the fabric in colored ink. You stitch over each printed X in the matching color, and the ink washes out when you are done. The fabric tells you where to put the needle.
In counted cross stitch, the fabric is blank. The design lives on a separate chart, and you transfer it by counting: the chart says the next stitch is three squares to the right of the last one, so you count three squares of fabric and stitch there. Aida's visible blocks make this practical, because "count three squares" means counting three blocks. Almost all cross stitch today is counted: the kit on the craft-store shelf, the PDF from an Etsy designer, and the chart that comes out of a photo converter all work this way.
| Counted cross stitch | Stamped cross stitch | |
|---|---|---|
| Fabric | Blank Aida, evenweave, or linen with a visible grid | Fabric with the design printed in wash-out ink |
| How you know where to stitch | Read a chart and count squares | Follow the printed X marks |
| Design freedom | Any chart, including ones you make yourself | Only what was printed |
| Difficulty | One stitch to learn, plus counting | One stitch to learn; placement is done for you |
| Precision | Every stitch lands in its own square — crisp edges, fine detail | Ink rarely lines up with the weave, so stitches wander |
| Typical price | Kits $10–40; charts alone $5–15, with many free | Kits $8–25 |
| Who it suits | Anyone who wants detail, choice, and eventually their own designs | Young children, low-vision or limited-dexterity stitchers, and anyone who wants a no-decisions project |
The tradeoff is real. Stamped cross stitch is the gentler introduction and needs no setup at all. But the printed marks rarely line up with the fabric's weave, so the finished piece looks softer and less even than the same design counted. Counted cross stitch asks a little more of you up front and gives back a crisper result and an unlimited supply of charts — including the ones you design.
Counted cross stitch also has a family. Counted thread embroidery — sometimes shortened to counted embroidery — is the umbrella term for any technique where stitches are placed by counting the threads or squares of the ground fabric rather than following a drawn line. Cross stitch is by far its most popular member. Blackwork (geometric fills in a single dark thread), Hardanger (Norwegian work with satin-stitch blocks and cut threads), Assisi work (you stitch the background and leave the motif blank), and needlepoint on canvas all belong to it. Needlepoint vs cross stitch compares the two most popular members of the counted family.
Is cross stitch hard?
The honest answer has two halves.
The stitching is not hard. A full cross stitch is two diagonal passes of the needle through four holes that are already there in the fabric. Most people have the motion within five minutes, and after an hour it is automatic. No drawing skill is involved and no judgment about where a stitch belongs — the chart made those decisions already.
What takes practice is the counting — keeping your place on the chart and on the fabric at the same time. Three things trip up nearly every beginner, and experienced stitchers have a habit for each:
- Losing your place on the chart. You look down to stitch, look back up, and the symbols have reshuffled themselves. Mark progress as you go — a highlighter on a printed copy, or a tablet app that ticks off squares — and work in blocks of ten so you never hold more than one block in your head.
- Miscounting across a row. The classic error is crossing a stretch of blank fabric between two motifs and landing one square off; you find out ten rows later. Experienced stitchers avoid long jumps. They work outward from stitched areas so every new stitch is counted from a neighbor, count any gap twice, and grid larger pieces so the fabric carries the same bold lines as the chart.
- Tension. Pull too hard and the fabric puckers and the X pulls into a thin line. Leave it too loose and the legs stand up in loops. A hoop keeps tension consistent while you learn, and Aida is stiff enough to forgive either way.
None of these is a matter of talent. They are habits, and the first project is where you build them.
For a sense of scale: a 50 × 50 stitch design — a typical small kit — is up to 2,500 stitches. Beginners work at roughly 100 stitches per hour; comfortable stitchers reach 200 or more. That puts a first project between 12 and 25 hours, or two to four weeks of evenings. A bookmark at 30 × 30 (900 stitches) is a five-to-nine-hour weekend. How long does cross stitch take goes into the estimates, including what backstitch and color changes add.
For reassurance from people who were where you are recently, look at the first-finish posts on r/CrossStitch. The pieces are rarely perfect. They are all recognizably finished.
Common beginner mistakes
These come up again and again on the first two or three projects. Every one has a fix.
Starting in a corner. It feels natural to start at the top left of the chart and the fabric. Then the design ends up with 5 inches of margin on one side and half an inch on the other. Start at the center, every time.
Discovering a miscount ten rows later. Stop and look at what is affected. If a whole motif has shifted one square and nothing else touches it, you can often leave it — nobody will know. If the shift will collide with something still to be stitched, the stitches have to come out. Stitchers call this frogging (rip it, rip it), and how to fix cross stitch mistakes covers when to frog and how to do it without damaging the fabric.
The top legs go both ways. Half the X's lean one way and half the other, and the area looks mottled even though every color is right. It happens when you turn the hoop while working. Pick a direction on the first stitch and check it whenever you rotate the fabric.
Carrying dark thread behind light fabric. A run of black behind unstitched white Aida shows as a gray shadow from the front and never washes out. Finish the thread and restart, or park it no more than an inch away.
Using all six strands. The floss comes as six, so the natural assumption is that you use it as it comes. Six strands will not pass cleanly through 14-count holes and will bulk the fabric out of shape. Two strands.
Knots on the back. They show as bumps once the piece is framed. Loop start to begin, weave under stitches to end.
Twisted thread. As you stitch, the floss twists on itself and the strands spiral instead of lying side by side. Every dozen stitches, let the needle dangle for a moment and it will spin itself straight.
Kits vs your own patterns
A cross stitch kit bundles everything on the supply list: pre-cut Aida, floss sorted onto a card and labeled to match the chart, a needle, and the chart itself. For a first project that is exactly the right amount of decision-making, which is to say none. The frustrations are minor — floss quantities run tight, the fabric can be a stiffer grade than you would choose, and some kits label floss with their own numbers rather than DMC codes, which makes replacing a color awkward.
The step after kits is stitching from a chart alone. Designers sell PDFs on Etsy and their own sites, DMC publishes free charts, and once you own a few skeins and some fabric a chart is all you need. Lord Libidan and Peacock & Fig both write extensively for stitchers making that move.
The step after that is making your own. A cross stitch chart is a grid of colored squares, which means anything that can be turned into a grid can be turned into a chart. The free photo to cross stitch converter takes a photo, lets you pick the fabric count, the finished size, and the number of colors, and gives you a symbol chart with a DMC key — the same kind of chart a kit would hand you. The cross stitch pattern maker is the blank-grid version: draw a motif square by square, add lettering, and export the chart. Both run in the browser and are free to use; the printable PDF is what you pay for. If you have been thinking "I would stitch that if there were a chart for it," there is now a chart for it.
FAQ
How do you cross stitch for beginners?
Which way do you cross stitch?
Is counted cross stitch hard?
What is counted cross stitch?
What is the difference between counted and stamped cross stitch?
How many strands of floss do you use for cross stitch?
How long does a cross stitch project take?
Further reading
- DMC — the floss brand nearly every chart is written in, with free charts
- Peacock & Fig — beginner tutorials, including the sewing method for faster stitching
- Scarlet Quince: Parking — the community's standard reference for the parking method
- r/CrossStitch — first finishes, questions, and encouragement
Make your first cross stitch pattern
Turn a photo into a chart with a DMC key, or draw one from scratch — pick the fabric count and see the finished size as you go.
Make your first patternFree to use. No account required.
Related Guides & Tools
How to read a cross stitch pattern
Symbols, the key, center marks, and page references — everything a chart is telling you.
The parking method
How parking works, when it beats cross-country, and how to keep a dozen needles from tangling.
What is Aida count?
What 11, 14, 16, and 18-count mean, how count changes finished size, and which one to start on.
Backstitch in cross stitch
The outline stitch that turns colored squares into a finished picture — when to use it and how many strands.
How long does cross stitch take?
Stitches per hour, what slows a project down, and realistic estimates for common sizes.
How to fix cross stitch mistakes
Miscounts, wrong colors, and puckered fabric — when to frog and how to do it cleanly.